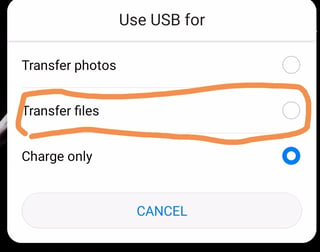
Connecting to PC through USB (MTP) doesn't expose underlying filesystem (ext4 or f2fs) of internal storage (/data partition) to PC. But recovery programs need direct access to filesystem i.e. block level access and won't work with MTP (Transfer Files) which is just a client-server type protocol for data transfer.
You need USB Mass Storage (UMS) which is disabled on Android 3.1.x and above, when MTP was introduced and then UMS was discontinued gradually afterwards in later releases. See Android's Storage Journey and my answer to What is /storage/emulated/0/? for details.
OEMs may add UMS configuration to their devices. For samples you may see on property:sys.usb.config=mass_storage triggers in init.qcom.usb.rc and init.msm.usb.configfs.rc files in a Qualcomm device source.
However it's always possible to enable UMS manually provided that kernel support is present. The process described below should also work for older devices those had UMS officially supported. You need root access or at least custom recovery to enable UMS.
HOW TO ENABLE UMS?
Android Composite Gadget driver (which is an extension to Linux kernel's USB Gadget API) exposes Android in USB device mode to a USB host like PC. Different USB functions (like UMS, MTP, RNDIS etc.) can be configured and switched using sysfs interfaces. Later mainline Linux kernel added the ability to configure USB gadget modes through configfs interfaces. New Android devices also use the same (see this sample init's .rc file).
OLD DEVICES:
Kernel must be built with CONFIG_USB_F_MASS_STORAGE and Android Composite Gadget driver (CONFIG_USB_G_ANDROID):
cd /sys/class/android_usb/android0
echo -n 0 >enable
echo -n '/dev/block/bootdevice/by-name/userdata' >f_mass_storage/lun/file
echo -n 'mass_storage' >functions
echo -n <VID> >idVendor
echo -n <PID> >idProduct
echo -n 1 >enable
* Other files in gadget such as {iSerial,iProduct,iManufacturer} are usually set on device boot when creating the gadget.
NEW DEVICES:
Kernel must be built with CONFIG_USB_CONFIGFS_MASS_STORAGE:
cd /config/usb_gadget/g1
echo -n 'msc' >configs/b.1/strings/0x409/configuration
echo -n <VID> >idVendor
echo -n <PID> >idProduct
for f in configs/b.1/f*; do rm $f; done
ln -s functions/mass_storage.0 configs/b.1/f1
echo -n '/dev/block/bootdevice/by-name/userdata' >configs/b.1/f1/lun.0/file
* Other files in gadget such as UDC and strings/0x409/{manufacturer,product,serialnumber} are usually set on device boot when creating the gadget.
NOTES:
- Paths may vary - including directories
g1, b.1, f1 etc. - depending on device and the hard-coded configuration.
- In most cases you need to set proper USB Vendor ID (VID) and Product ID (PID) to make the PC identify the mass storage device. E.g.
05C6 is Qualcomm's VID and 1000 is their PID for UMS device. See .rc files on your device for device specific IDs.
- Exposing mounted
/data filesystem to UMS may corrupt the filesystem, and must be avoided. Use UMS in recovery mode.
- If your
/data partition is FDE encrypted, you need to decrypt it before exposing to UMS.
- To make sure your data is recoverable, see my answer to How to make a complete factory reset, without anyone being able to retrieve my data?
Now /data will appear as a partition on Linux PC which you can mount (preferably read-only to avoid overwriting data). However recovery tools including extundelete mostly don't need mounting filesystems.
If you have custom recovery, another option is to dd out an image of /data partition to external SD card and then mount it on Linux PC as a loop file. For this and other options to access internal storage at block level, see my answers to related questions.
PS:
Using the same methods it's possible to expose a loop file like ISO image or any other filesystem as UMS or CDROM device by writing its path instead of block device path.
RELATED:

