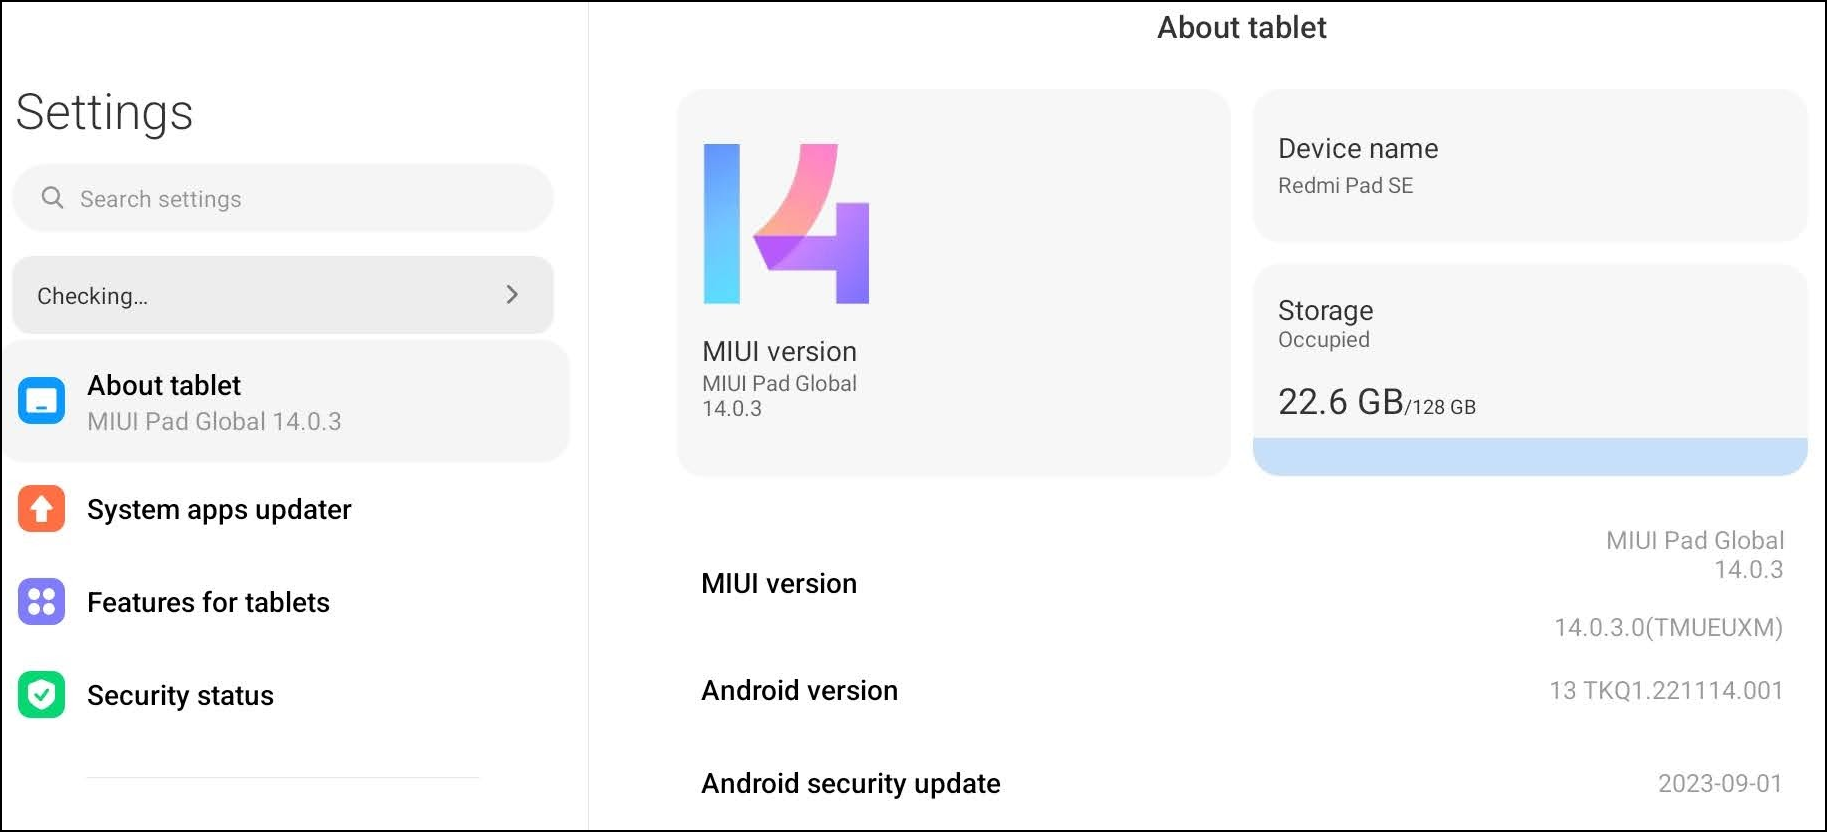
I wrote this guide for anyone with "Redmi Pad SE" (a tablet) which comes with "MIUI 14" and "Android 13".
In Settings > About Tablet you have the MIUI and Android versions.
Take note of them.

In my case:
MIUI 1.0.3 TMUEUXM
Android 13 tkq1.221114.001
Note: The device came with MIUI 1.0.1 but the ROM versions available online where for 1.0.2 and 1.0.3, so I upgraded it from within MIUI/Android. As you will see later, you will need to download the ROM/Firmware.
Update 2024-08-21: "Seems to be working (also) for HyperOS 1.0.2.0" -- Vi0
Requirement
First, you need to request the bootloader to be unlocked as soon as possible, because you will have to wait 7 days until it can be done.
https://www.miui.com/unlock/index_en.html
https://en.miui.com/unlock/download_en.html
The program provided by Xiaomi is for Windows and it says it will wipe out any data you had inside the Android device.
If you see that something is failing in the connection with the device, click on options. There is a section to Install drivers into Windows.
After the 7 days, unlock the device and continue.
The official instructions to install Magisk are here
https://topjohnwu.github.io/Magisk/install.html
However, as described here
https://aiomobilestuff.com/root-android-13-via-magisk-patched-init_boot-boot/#comment-149823
for devices that come originally with "Android 13", the process is slightly different. In particular, you will work with init_boot.img and NOT with boot.img
1: Install Android SDK (Windows)
or
1: Install adb and fastboot (Linux)
# sudo apt install adb fastboot
2: Enable USB Debugging and OEM Unlocking
Clicking on MIUI version several times you will enable 'Developer mode' (see the image above).
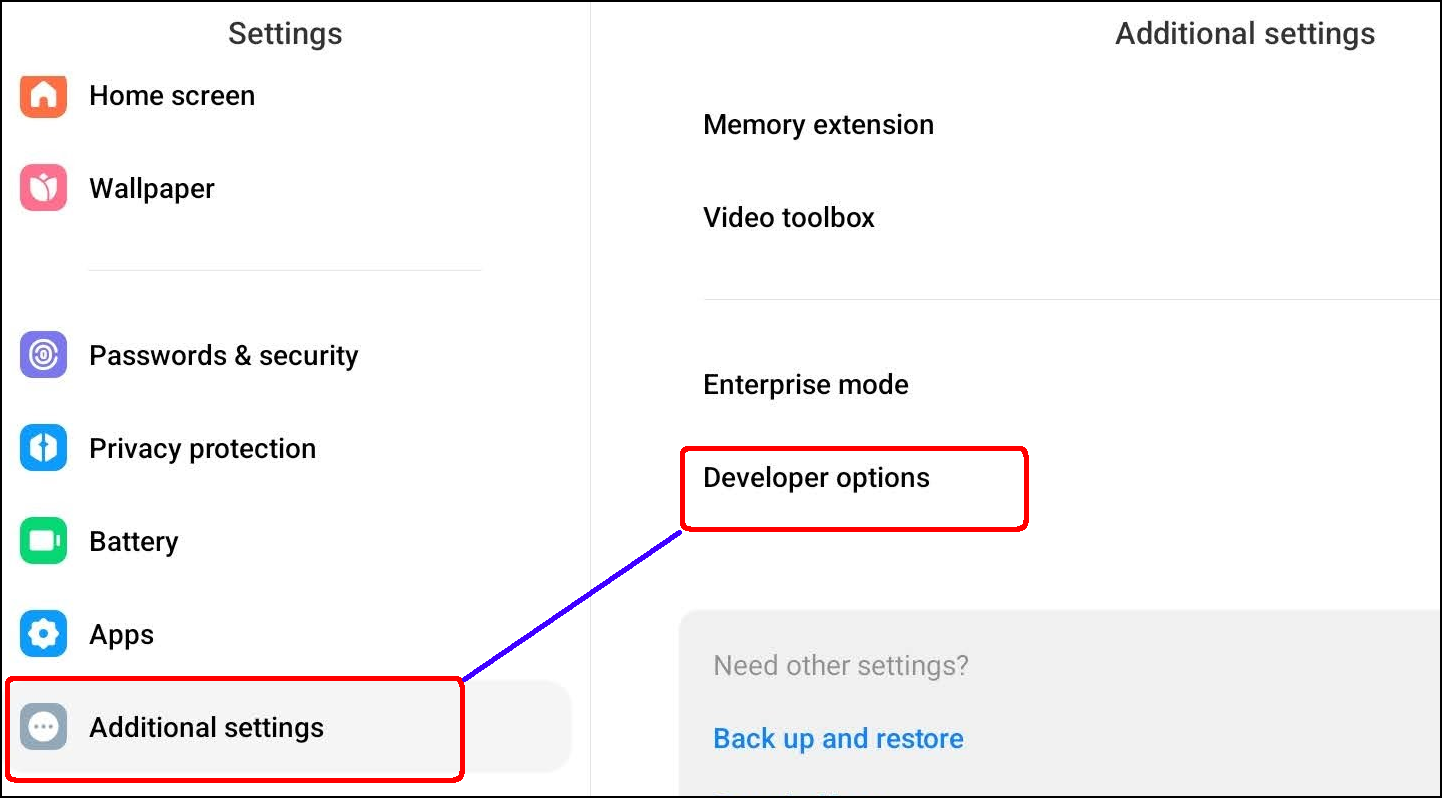
Then under Settings > Additional Settings you will find 'Developer options'

There are many places describing how to Enable USB Debugging. I won't go into that.
3: Extract Stock init_boot.img
This is very unclear on the official instructions. It just says "If your device has boot ramdisk, get a copy of the boot.img (or init_boot.img if exists)."
Well, google for your MIUI version ("MIUI 1.0.3 TMUEUXM" in this case) and you will find repositories for the firmware that you have installed.
In my case I got it from 2 different sources and compared that the results were identical.
(You may find something different)
They were called
miui_XUNEEAGlobal_V14.0.3.0.TMUEUXM_f8cfc20eb5_13
miui-blockota-xun_eea_global-V14.0.2.0.TMUEUXM-V14.0.3.0.TMUEUXM-ecc1df367d-13.0
You can just unzip it, but then you need to extract the payload.
For that I used payload-dumper-go from https://github.com/ssut/payload-dumper-go
Find inside the decompressed payload the init_boot.img
Optional: I compared that file from both firmwares to verify they are identical. For that you can use md5sum or similar.
4: Install Magisk App on Android
Get the latest APK from its official web ( https://github.com/topjohnwu/Magisk/releases ), NOT from Play Store.
5: Patch the init_boot.img with Magisk and flash it
All the adb / fastboot commands below are to be run from a PC. There are ways to root Android without PC but I haven't tested it.
# With the Tablet in normal mode and powered on (well charged).
# Copy the init_boot to Android
$ adb push init_boot.img  /sdcard/Download/
Proceed to patch that file within Magisk. This is explained in many places.
IMPORTANT NOTE ABOUT FUTURE UPDATES OF MIUI:
[updated 2024-02] If you accept any of the MIUI OS updates, your rooted init_boot will be replaced by the update, your tablet will stop being rooted (the apps that need a rooted device will stop working properly) and you will have to repeat the steps from here. Although one could argue that it should be from point 3 to be fully correct. I just did it from here (I didn't care about the changes made by the update) and it went well (may not be always like that, be warned).
END OF IMPORTANT NOTE ABOUT FUTURE UPDATES OF MIUI
# Get the patched file from Android to PC
$ adb pull /sdcard/Download/magisk_patched-<something_here>.img

# Reboot Android into fastboot
$ adb reboot bootloader

# Flash the patched img from PC into Android
# This is the part that is different for devices that came with Android 13.
$ fastboot flash init_boot magisk_patched-<something_here>.img

# Reboot Android
$ fastboot reboot
Done.
Now Magisk should say that it is installed.


